
3.2.2026
5 Contact Management Features in Snaily Worth Using
If you’re actively working with contacts in Snaily, chances are you’re only using a part of what’s actually possible.
Most users start with the basics — importing contacts, sending messages, launching campaigns. But once you dig a little deeper, you realize there are small features that can dramatically simplify your workflow, improve personalization, and make your outreach much more structured.
In this article, we’ll walk through 5 practical contact-management tips in Snaily that users ask about most often — and that can immediately improve how you organize leads, work as a team, and follow up more consistently.
Snaily.io is getting smarter — read about our recent updates here.
Snaily Blog
Build custom lists of contacts
Many users come to Snaily with an existing contact database. It could be leads collected from conferences, exported from a CRM, or manually curated LinkedIn profiles.
The first important thing to understand is that Snaily allows you to work not only with contacts found via LinkedIn or Sales Navigator, but also with fully custom contact lists.
To upload your own list, go to the Contacts page, click Add Contacts, and select Upload Customised LinkedIn Profiles. Snaily will prompt you to download an example CSV file, which serves as a template.

When working with this file in Excel or Google Sheets, the most important rule is simple: the only required field is LinkedIn Profile — the direct link to the person’s profile.
There is one important detail: when uploading custom lists, Snaily works only with the data you provide. It does not automatically pull first name, last name, company name, or position from LinkedIn. This means that if you want to use these fields for personalization, you need to include them in the CSV file yourself — in fields such as first name, last name, company name, position, and country.
This is also where one of Snaily’s most powerful capabilities comes into play — custom fields.
In the columns custom field 1, custom field 2, and custom field 3, you can include any information you want. For example, the name of an open role, a link to a job posting, or even a fully written personalized message.

Then, when creating your campaign, you can use these fields in your message template. For example:
“Hi {first name}, I saw that {company name} is hiring for {custom field 1}. I found this role here: {custom field 2}.”

This allows every message to feel individually written — even when sent at scale.
Just make sure to save the file in CSV format and keep all column headers intact, even if some columns remain empty. The headers are essential for Snaily to correctly recognize and use the data.
Share contacts between team members
Sales Navigator is an incredibly powerful lead generation tool — but it’s also expensive. As teams grow, a natural question emerges: do you need a separate subscription for every team member?
Snaily allows you to work more efficiently.
Imagine that one team member has already collected and imported contacts into Snaily. These contacts can be shared with another team member in just a few clicks.
To do this, go to the Contacts section, apply filters or manually select the contacts you want, then click Send to Team Member. Choose the team member from the list, and the contacts will appear in their account under Recently Imported.

This changes how teams operate. One person can focus on sourcing leads, while another handles outreach and conversations.
Sales Navigator stops being an individual tool and becomes a shared resource.
Qualify leads immeadiately
Every outreach campaign starts with sending messages. But the real work begins when replies start coming in. Some contacts are interested. Some are not relevant. Some respond immediately, while others take weeks. To manage this effectively, Snaily allows you to qualify contacts directly inside the messaging interface.
When you open the Messaging section and view a conversation, you can assign a status to the contact — Relevant, Irrelevant, or Unqualified.

These statuses then become powerful filters.
For example, you can go to the Campaigns section, open a specific campaign, switch to the Leads tab, and filter contacts by status to view only relevant leads.
Over time, your contact database evolves into a structured pipeline, allowing you to focus only on high-value opportunities.
Schedule messages
One of the most common reasons outreach fails is simple: follow-ups don’t happen. Not because people don’t want to follow up, but because they forget, get distracted, or run out of time.
Snaily allows you to schedule messages in advance.
Inside the Messaging interface, when composing a message, you can choose to schedule it instead of sending it immediately. Simply select the date and time, and Snaily will send the message automatically.

This enables you to build a structured communication flow. You can send an initial message today, schedule a follow-up in three days, and another one a week later — all in advance.
Outreach becomes consistent and predictable.
Filter newly added contacts on Snaily
Another common scenario: your Sales Navigator lists get updated with new contacts, but identifying which contacts are actually new becomes difficult.
Snaily solves this with its contact filtering system.
After importing contacts, go to the Contacts section, open Filters, and select the Added to Snaily filter.
You can then choose a time frame — for example, Past Day — to see only the contacts added today. This allows you to immediately focus on newly added leads, without revisiting contacts you’ve already processed.

Want to learn more?
Our team will be happy to walk you through everything on a personalized demo call or answer any questions via email.
Contact us at support@snaily.io
Or book a demo call here:
https://calendly.com/snaily-demo-call-schedule/30min
Related articles
by Alfred
tips
2.18.2026
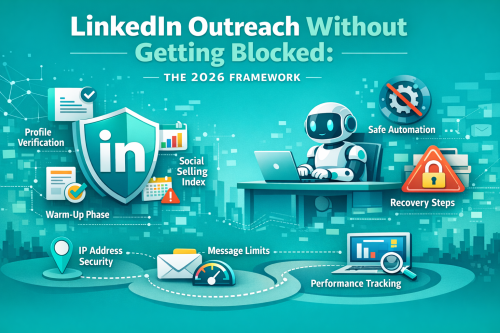
LinkedIn Outreach Without Getting Blocked in 2026
LinkedIn restrictions and account blocks are becoming more common — especially for professionals running outreach or managing multiple profiles....

by Alfred
tips
3.25.2024
LinkedIn News 2024: AI tools, security update and algorithm tweaks
2024’s rolling in with some fresh updates on LinkedIn, and it looks like we’re all in for a treat. LinkedIn’s planning to jazz...

by Alfred
tips
2.26.2024
Boosting Automation:11 Ways to Improve LinkedIn Automation 🚀
Hey there! 🌟 Dive into the savvy world of LinkedIn automation, armed with these insider tips and a little magic from Snaily.io. Let’s break it...
by Alfred
tips
2.21.2024
LinkedIn Account Restricted: Why and What to Do?
Welcome to LinkedIn, the ultimate professional playground! 🌟 This platform isn’t just about connecting professionals; it’s a...
